Ever wandered into a cozy Canadian home and spotted a unique wall clock that not only told time but also told a story? Clocks aren’t just about ticking seconds—they’re pieces of art, crafted with a blend of precision and creativity, embracing everything from rustic farmhouse vibes to sleek industrial designs. If you’ve ever fancied diving into a rewarding DIY project that spruces up your wall decor and lets you put your own spin on timepieces, making a wall clock from scratch might just be your next big adventure. Whether you’re into artisan clocks or going for that bold industrial look, this guide will take you through every step — from gathering your craft supplies to the final installation, all while considering the best practices that align with Canadian homes and styles.
Packing your toolkit with the right materials, understanding the design that fits your space, and embracing the charm of custom clocks are essentials here. Plus, a nod to home improvement regulations and choosing appropriate mounts for different wall types keeps your creative endeavor safe and stable. Visualize your unique timepiece hanging above that vintage sideboard or in the sunny nook of your living room—crafted by your own hands. Ready to roll up your sleeves and breathe life into this artisan project? Let’s break down the process, step by step, making clockmaking accessible, fun, and satisfying. 🕰️🎨
Gathering Essential Materials for DIY Wall Clock Making in Canada
Before you even touch a single tool, getting together the perfect set of materials is king. Your choice of materials doesn’t just impact the final look but also determines how durable and practical your clock will be in a Canadian household where varied climates can play a role.
- 🛠️ Clock Movement Kit: This is the heart of your DIY project, including the clock mechanism and hands (hour, minute, and sometimes second hand). These kits can be sourced at Canadian craft stores such as Michaels or Lee Valley, typically priced around $15 to $40 CAD depending on the quality and brand.
- 🌲 Wood: Canadians often favour hardwoods like maple or oak for their sturdiness and beautiful grain, perfect for rustic or artisan clocks. Plywood is a cost-effective alternative, often around $20 to $50 CAD for a decent size sheet. Reclaimed wood is another favourite, eco-friendly and full of character.
- 🪚 Cutting Tools: A circular saw or jigsaw will be handy for cutting the wood to your desired shape. Many community makerspaces across Canadian cities like Toronto or Vancouver offer access to such tools for a nominal fee or membership.
- 🧽 Sandpaper: Grit variations ranging from 80 (coarse) to 240 (fine) will ensure a polished surface. Stock up at Canadian Tire or Home Depot for affordable packs, around $10 to $20 CAD.
- 🎨 Stains or Paints: Select a stain to highlight natural wood grain or choose paint to bring out bold colours, considering your home’s interior design. Remember low-VOC paints for a safer indoor environment, offered by brands like Benjamin Moore in Canada.
- 🖌️ Brushes and Rags: For applying stains or paints, quality brushes and clean cloths make the process smoother and yield a better finish. Expect to spend approximately $10-$25 CAD for a good set at craft outlets.
- ➰ Nails, Screws and Wall Anchors: Essential for securing the clock base and mount safely on drywall or plaster in Canadian homes. It’s wise to pick corrosion-resistant screws suitable for the Canadian climate.
- 📌 Clock Numbers or Markers: These can come as stickers, stencils, or metal numerals to suit your style. Hobby stores have a selection, with prices typically around $5-$15 CAD.
- 🧰 Wall Mounting Hardware: Includes hangers and brackets suitable for different wall materials common in Canadian homes such as drywall, brick, or plaster. Pick hardware rated to support the weight of your clock safely.
Here’s a quick overview of typical prices at Canadian retailers:
| Item 🔧 | Approximate Price (CAD) 💰 | Where to Buy in Canada 🏬 |
|---|---|---|
| Clock Movement Kit | $15 – $40 | Michaels, Lee Valley |
| Wood (Plywood/Hardwood) | $20 – $50 | Home Depot, RONA |
| Sandpaper Set | $10 – $20 | Canadian Tire, Home Hardware |
| Paint/Stain | $15 – $35 | Benjamin Moore, Home Depot |
| Brushes/Rags | $10 – $25 | Michaels, Dollarama |
| Wall Anchors & Screws | $5 – $15 | Home Depot, Lowe’s |
Once your craft supplies are gathered, organizing your materials and workspace optimally will set the stage for a fun and effective clockmaking session. Proper preparation often makes the difference between a rushed project and a masterpiece you’ll proudly hang on your wall!
Planning and Designing Your Wall Clock for a Perfect Fit in Canadian Interiors
Every gorgeous custom clock starts with a solid plan. Whether you’re inspired by the timeless artisan clocks of a Quebec cabin or prefer sleek industrial clocks fitting a Toronto loft, your design must sync harmoniously with your interior design vision. Smart planning mitigates mishaps and maximizes aesthetic impact.
Key Considerations in Clock Design
- 📐 Size and Space: Measure your available wall area carefully. For example, a large clock around 60 cm in diameter majorly suits spacious living rooms, while a compact 30 cm clock works well in office nooks or kitchens.
- ✏️ Shape and Style: Choose between classic round shapes, rustic slabs, or edgy geometric designs. Hypothetically, a reclaimed wood clock with hand-carved numerals adds rustic warmth, perfect in Alberta’s farmhouse settings.
- 🔢 Numbers or Markers: Decide if your clock will feature traditional numerals, minimalist dots, or Roman numerals. Stencils are a handy option for precise alignment and consistent spacing.
- 🎨 Colours and Finishes: Will you enhance the wood’s natural grain with a clear stain, or paint vibrant hues reflecting an industrial urban vibe? Play with glossy versus matte finishes to complement room lighting.
- 🕰️ Clock Hands: Select hands that not only fit the clock’s diameter but also its mood — sleek metal for modern spaces, ornate wooden ones for vintage flair.
- 🔧 Additional Features: Consider adding elements like a pendulum or a chime. Although less common in DIY projects, these touches amplify the artisan feel of your clock.
Visualization and Adjustment
Sketching out your ideas or using free design software can help ensure every detail is just right. Visiting local Canadian craft stores like DeSerres or browsing online galleries will inspire unique adaptations and can connect you to Canadian artisan clockmakers for insight.
| Design Aspect 🖌️ | Considerations for Canadian Homes 🏡 | Typical Choices 🎨 |
|---|---|---|
| Size | Room dimensions, wall space | Medium (30-45cm), Large (50-70cm) |
| Material | Hardwood preferred for durability and Canadian style | Maple, Oak, Reclaimed wood |
| Style | Rustic, Industrial, Minimalist | Hand-carved, Metal accents, Clean lines |
| Numbers | Visibility and design match | Stencils, Stickers, Painted |
| Finish | Matte for rustic, Glossy for modern | Wood stain, Acrylic paint, Varnish |
By defining your clock’s features early, you save valuable time during construction and ensure your wall decor elevates your home’s interior harmony.
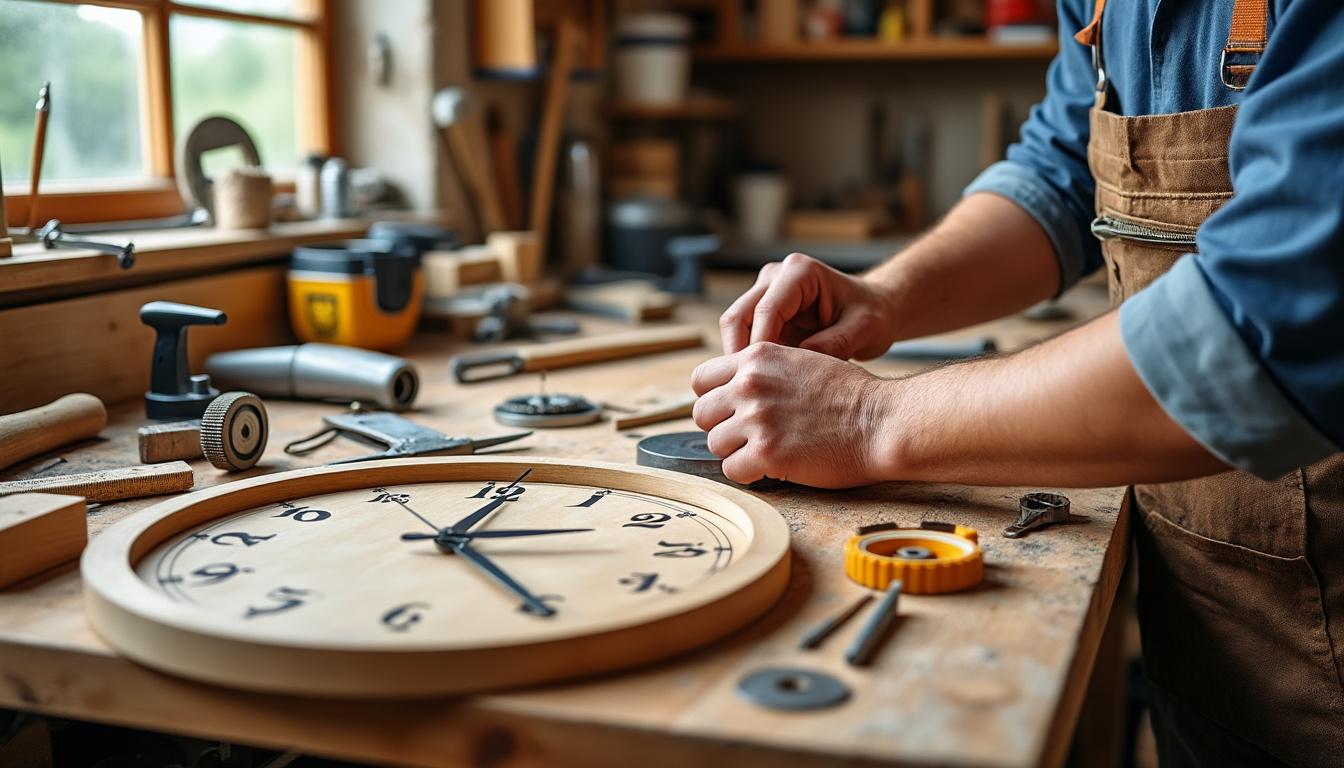
Cutting, Sanding, and Preparing Wood Base: Craft Supplies and Techniques
The magic of clockmaking unfolds once you start shaping the wood base, transforming an ordinary plank into a canvas for your custom timepiece. For Canadian crafters, precision and patience in this phase can make or break your clock’s look and longevity.
Step-by-Step Wood Preparation
- 📏 Mark Your Measurements: Use a pencil and measuring tape or straight edge to mark the cut lines precisely on your wood. Accuracy can save you waste and headaches later.
- 🔒 Secure Your Wood: Clamping down your wood on a stable workbench prevents slips during cutting, a key safety tip especially when using power saws.
- 🪚 Cutting Techniques: For round shapes, a jigsaw with a fine blade works best. For straight edges, a circular saw guided by a straight edge gives clean cuts. Always wear safety glasses and masks.
- 🧽 Sanding Process: Start with a coarse 80 grit paper to smooth rough edges and work up through 150 and finally 220 grit for a refined finish—don’t rush this step!
- 🧹 Clean Up: Wipe down with a clean cloth to remove all sawdust, preparing your base for staining or painting.
| Step 🛠️ | Tools & Supplies 🧰 | Important Tips 📝 |
|---|---|---|
| Measuring | Measuring tape, pencil, square ruler | Double-check measurements; measure twice, cut once |
| Cutting | Jigsaw, circular saw, clamps, safety glasses | Secure wood; use appropriate blades for smooth edges |
| Sanding | Sandpaper (80, 150, 220 grit), sanding block | Sand with wood grain; gradual grit progression |
| Cleaning | Clean cloth or tack cloth | Remove all dust to ensure good stain or paint adhesion |
Whether you frequent a local makerspace or your own garage workshop in places like Calgary or Montreal, adhering to these steps can make a visible difference in the final artisan clock you create.
Painting or Staining Your Clock Base: Personalizing Artisan Clocks
Painting or staining your clock base is where personality shines. This step not only protects the wood but also enhances the overall aesthetic appeal—crucial for wall decor that’s meant to catch eyes and complement interior design schemes.
Choosing the Right Finish
- 🎨 Natural Wood Stain: Ideal for showing the rustic texture of hardwood, stains can range from light maple hues to deep mahogany tones. Consider making a homemade Canadian version by soaking steel wool in white vinegar for a unique patina effect.
- 🖌️ Paints: Go for either matte or semi-gloss acrylic paints. Low-VOC options are preferable indoor air quality choices, and Canadian brands like Benjamin Moore offer palettes suited for modern and traditional homes.
- ✨ Protective Coating: Apply a clear polyurethane or varnish to shield the finish from humidity, especially important in regions like British Columbia with higher moisture.
Follow these painting and staining tips for best results:
- 🧼 Clean the surface thoroughly before applying any finish to avoid blotches.
- 🖌️ Use even strokes following the wood grain direction.
- ⏳ Allow ample drying time between coats—double-check product instructions.
- 🛡️ Lightly sand between coats for smoothness.
| Finish Type 🎨 | Advantages 👍 | Best Use Cases 🏠 |
|---|---|---|
| Wood Stain | Enhances natural grain, durable, rustic look | Country-style, rustic, artisan clocks |
| Paint (Matte & Semi-Gloss) | Vibrant colours, modern finish, customizable | Industrial clocks, contemporary interior designs |
| Protective Varnish | Seals finish, protects against moisture and wear | High-humidity areas, all clock styles |
Nailing this step not only boosts the clock’s longevity but also ensures your home improvement project impresses guests and matches the existing decor flawlessly.
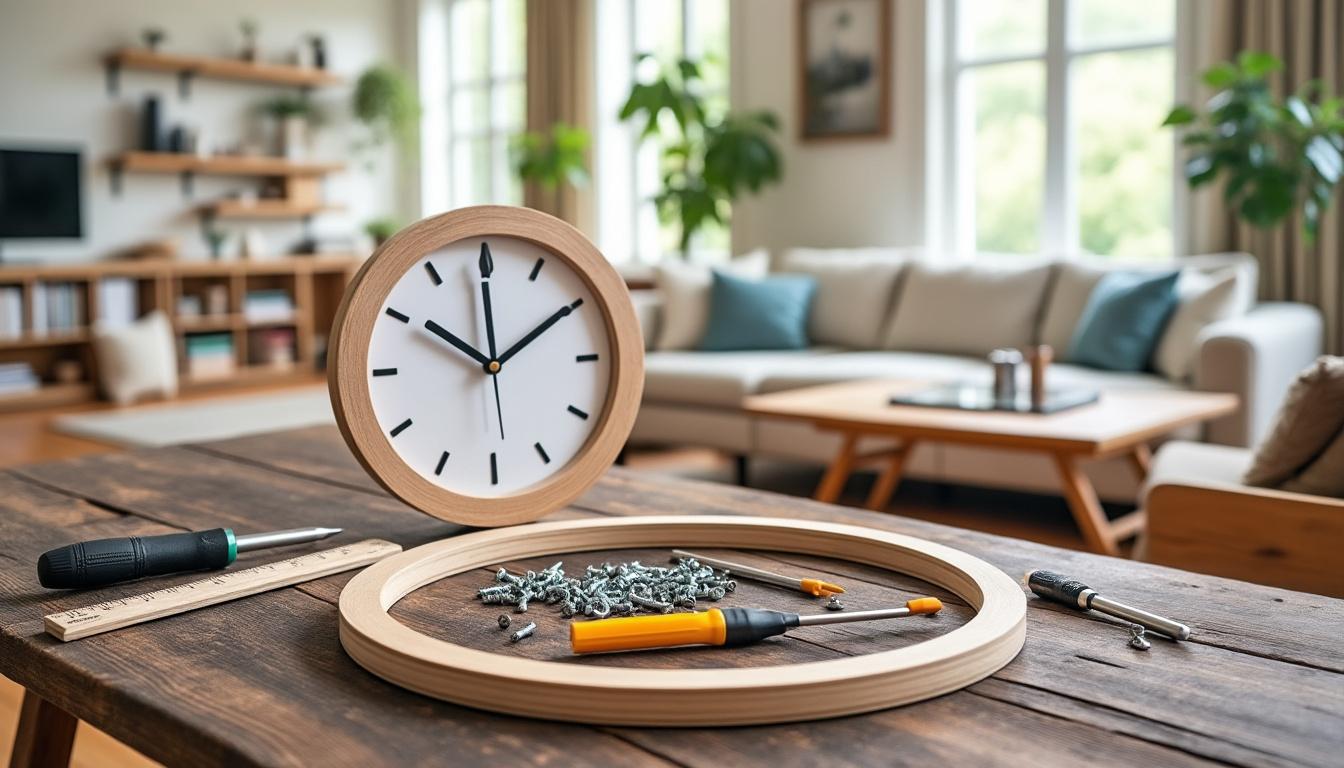
Assembling, Mounting, and Hanging Your Custom Clock Safely in Canadian Homes
The final stretch of clockmaking involves assembling the components, mounting the clock movement securely, attaching numbers, and finally hanging your work of art on the wall. Safety and stability are paramount, especially given Canadian housing variations, from apartment drywall to older plaster walls.
Assembly and Mounting Checklist
- 🔩 Attach Clock Movement: Create a hole in the wood base’s centre, insert and fix the clock mechanism according to the kit instructions.
- 🕰️ Install Clock Hands: Carefully attach hour and minute hands, ensuring they move freely without bumping into numbers or the clock face.
- 🔢 Apply Numbers or Markers: Position with precision for readability. Use stencils, paint, or adhesive numerals to suit your style.
- 🪛 Secure Wall Mount: Use heavy-duty screws and wall anchors designed for Canadian building materials. For drywall, toggle bolts or molly bolts provide extra support.
- 🖼️ Hang Clock: Locate wall studs with a stud finder for optimal support when hanging heavier clocks. Ensure your clock is level and stable.
| Step ⚙️ | Tools & Tips 🔧 | Canadian Home Considerations 🏠 |
|---|---|---|
| Mount Movement | Drill, nuts, washers from kit | Ensure flush mounting to avoid hand obstruction |
| Install Hands | Secure nuts, gentle alignment | Check hand clearance with numbers |
| Attach Numbers | Stencils, spray paint, stickers | Use clear visibility methods |
| Mount Hardware | Screwdrivers, heavy duty anchors, level | Choose anchors suited for drywall/plaster |
| Hanging | Stud finder, drill, level | Heavy clocks: hang on studs, light clocks: anchors suffice |
FAQ About Making Your Own Wall Clock in Canada
-
Where can I find affordable clock movement kits in Canada?
You can check Michaels, Lee Valley, and online Canadian craft suppliers. Prices often range from $15 to $40 CAD depending on quality.
-
What wood types are best for making a durable wall clock?
Hardwood species like maple and oak are highly suitable for Canadian homes. Plywood or reclaimed wood make budget-friendly alternatives with rustic charm.
-
How do I ensure my clock is securely hung on drywall?
Use wall anchors or toggle bolts rated for the clock’s weight. Whenever possible, hang on wall studs using a stud finder for maximum stability.
-
Can I personalize the numbers on my clock?
Absolutely! Using stencil vinyl and spray paint or adhesive numerals, you can customize fonts and styles to match your interior design.
-
How do environmental factors in Canada affect my clock?
Humidity and temperature fluctuations can impact wood and clock movement. Use protective finishes and maintain clocks in moderate conditions for longevity.